


NARRATIVE: MAKING a scene with AI
- Chris

- Jul 3, 2024
- 5 min read
Updated: Jul 4, 2024
In my last post about making video with AI tools, I said I wouldn't do it again until the tools got better. In the past couple of months, announcements and releases of incredible AI-assisted video-making tools have been going gangbusters. The ones on most people's minds are OpenAI's Sora, Luma Dream Machine, and Runway Gen 3. They all are capable of producing pretty amazing and coherent video imagery. But one problem with all of these tools is that while they can produce a beautiful and intricate moving environment, they still lack the ability to create a scene typical of a motion picture or television program that uses multiple camera angles to cover the action.
So my challenge to myself was to make a narrative scene with coherent film-style coverage and consistent characters, backgrounds, and movement. I don't believe that I could have been successful at this endeavor had I attempted to make the scene photorealistic, so I went the easier route of using the simple anime style typical of a Studio Ghibli film. As such, I decided to make life a little bit easier still by using the well-known character of Totoro as one of the three characters in the scene.
Here's the result:
My three main workhorse tools for this project were Photoshop, Davinci Resolve, and Stable Diffusion. In addition to these were Blender, DALLE 3, Ideogram, Domo, Krea, Pika, Morph Studio, Nim, Luma Dream Machine, Gigapixel, LensGo, and Udio. I'm probably forgetting a couple!
The process took a couple weeks, as I was very much learning as I went. Because of this, I did not have a specific workflow through which I achieved all of the shots. Each one took a different path. That said, by the end, I did have things refined to a point where I had a baseline workflow to use as a starting point.
The whole process started by creating the primary background, which I did in Ideogram, and refined heavily in Photoshop.

When I created the background, I only expected to make this single wide shot, so did not bother at the time to think about how I would deal with backgrounds from other camera angles.
Next up was creating the rain. I had to learn the basics of Blender to do this. I used the Grease Pencil tool to make the droplets, with many modifiers to create the full volume of drops, their size, shape, and blur properties.

Next, back to Ideogram to create our primary Totoro image. It turns out animating Totoro was quite difficult, and if I were to do this again, I'd probably use Blender to create a custom creature that I could pose and animate and then run through Stable Diffusion for style transfer. But the idea of putting my own spin on the classic Totoro bus stop scene had gotten me excited about this project in the first place, so I'm glad I stuck with it. Once I had the basic Totoro image, I extracted that image from the background, upscaled it with Stable Diffusion and Gigapixel, and created the image on green screen.

I would like to have just used the extracted image with an alpha channel for ease of compositing, but the AI tools for animation are not able to handle alpha channels. So I opted for 'perfect' green and blue screens instead.
Next came the fun part. Inspired by Corridor Digital on YouTube and Framer on Twitter (I refuse to call it X), I then used my iPhone to photograph myself acting out the actions of the man in the scene. I did this in my garage in the middle of the night. I wanted to have the approximately correct lighting on the character, so I broke out a couple of my movie lights to light myself. It's a pretty slapdash job of lighting, but I knew that this was going to end up in anime, so I didn't want to spend more time than necessary getting things perfect.

For each shot, I went into Davinci Resolve and trimmed the clip to approximately what I thought I would need, including some handles. As you can see, while I would have preferred to use a blue screen for this, that was beyond my resources. However, with Fusion in Davinci Resolve Studio, I was quickly able to create a matte for the shot by using Magic Mask and a garbage matte. Magic Mask is truly amazing, and while it is intended to create selections for color grading, it was more than up to the task of creating mattes good enough for the video-to-video style transfer I was about to put the shots through.
Once the shot was masked, I composited it over a blue screen background, again in Davinci Resolve.
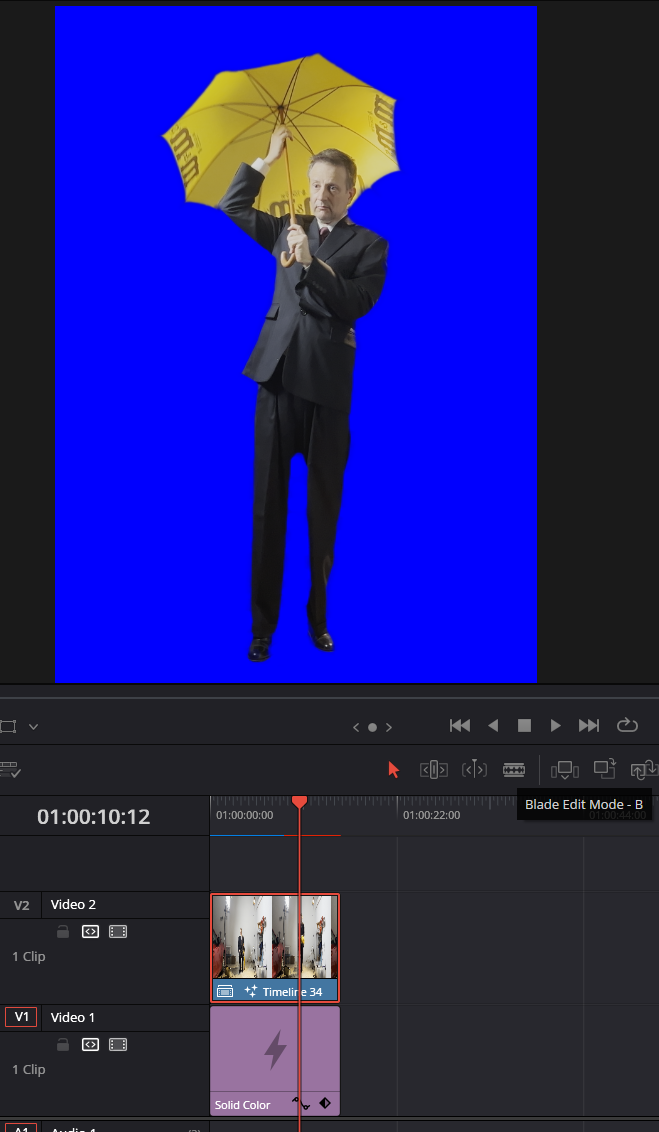
This was necessary because Stable Diffusion wouldn't have had the freedom to do a proper style transfer if I forced it to stay inside the matte I had created, and the blue allowed Stable Diffusion to concentrate on doing the style transfer on what I care about (the person), and not the cluttered background of the original shot.
Next was creating the video-to-video style transfer. I tried all the tools for this, but landed on a ComfyUI workflow from Yvann (@yvann_mp4 on Twitter), that I modified slightly. This involved using IPAdapter, so for each shot, I needed to create a reference image. I found that it was important to get the IPAdapter image to be as close as possible to the style and composition I was going for, so this often meant lots of trial and error in ComfyUI, DALLE3, Ideogram, Krea, and Photoshop to get a good image.

Once I had all the settings dialed in along with a good reference image, the workflow was pretty consistent in creating what I wanted. The extreme closeup insert shots were an exception, though. Each of those required lots of work in many tools to get them to where they are now, which is not as good as I'd like them to be! I think that's because the AI models don't have great references for these kinds of shots, especially in an anime style.
Some animations were done outside of this workflow, using the animation tools in Photoshop (kind of a very lightweight After Effects), Toon Crafter, or Luma. Each of these was a special case without a specific workflow.
Once the style transfer of a shot was done, it was a pretty simple matter to go into Davinci Resolve and composite the elements together. The blue screen backgrounds I created generally survived the style transfer process very well, so the Delta Keyer in Resolve Fusion made quick work of recreating the matte for those shots.
I did do some more animation work for some shots in Resolve, around the Totoro character and the cat bus, both of which move in the frame in very specific ways that I could not generate with AI.
To wrap everything up, I generated a background music track in Udio. The very first roll got me a track I was happy with. Then some simple sound design with rain and purring sounds, and I was all set.
Things are moving very fast in the video creation realm using AI. I hope I can keep up!


Comments